DIY Striped Chairs
I have a charming French bistro set that has sat neglected on my front porch for about 5 years. I ordered it from a French imports catalog and was so excited when it arrived- my very own piece of France! It has been shabby chic from the start- being a distressed navy, but unfortunately it's always been rickety and was broken by someone who used it to cut wood on (grr- it wasn't a family member by the way but a paid professional). While I can't do anything about the broken table, I can revamp the chairs and pretend it's brand new! Let the fun begin.

1. Paint. I chose to go with spray paint, thinking this would be easier. I actually think I prefer just good old house paint. I chose to go with Krylon Indoor/Outdoor spray paint in Catalina Mist. I ended up going through one whole can of paint. We have another project for this color, hence the three cans pictured above.
2. Painters tape to tape off the areas you don't want to paint.
3. Butchers paper or something similar, again to cover the areas you don't want to paint
4. Scissors to cut paper (or you can just rip it if you're not picky)
5. A drop cloth or large piece of cardboard to cover the ground you are working on.
6. A face mask. The fumes- OH the fumes!
7. Protective eyewear. I just wore sunglasses but if you're really worried they make awesome plastic protective eyewear at your local hardware store
8. An apron (optional) to cover yourself ;)
9. Tunes (optional). I just can't do a project without music.

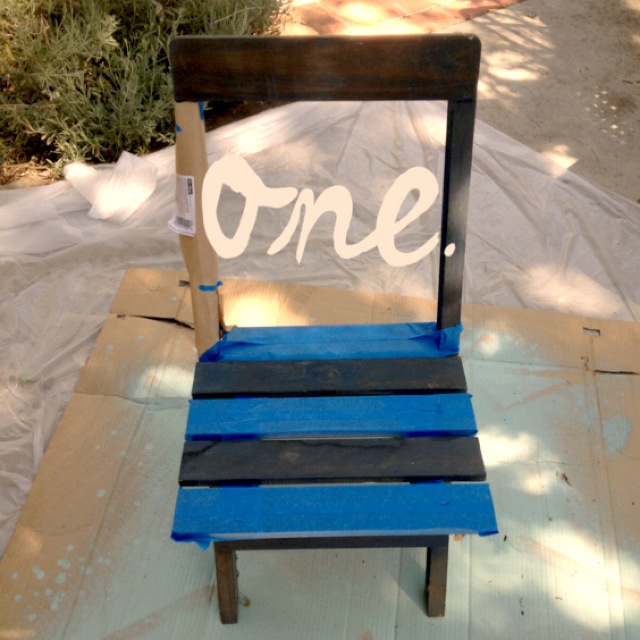
Tape off the areas you don't want to paint. Because I was creating stripes I taped off every other slat, as well as used the butcher paper to cover the larger areas. I didn't cover the legs of the chair, as I wasn't planning on painting them and wasn't picky about whether any overspray got on them.

Spray away!! Because this chair was weathered it just soaked up the paint. I needed to do 4 coats to satisfactorily cover the previous color. It I had wanted to keep the distressed look 2 coats would have done it.

Enlist your best furry friend to keep you company. There's nothing more boring than waiting for paint to dry. Good ol' Finny and I hung out and kept each other company.

After applying your desired amount of coats, wait for paint to thoroughly dry. Remove tape and paper- stand back and admire your handy DIY skills!

Voila! New and improved! I see coffee dates in this table's future!


I love the final look of the chair, and the fabulous look of the chairs every step of the way! Beautiful pictures and a great idea.
ReplyDeleteThanks Ali!!! :)
Deletexo Leah
That's a pretty inspired idea!!!
ReplyDeleteThanks! We had the paint for another project and the lightbulb just went off!! :)
Delete